DNA Dilution Calculator: Master Molecular Biology Preparations with Precision
Welcome to the ultimate tool for molecular biologists, researchers, and students - the DNA Dilution Calculator. This specialized calculator takes the guesswork out of preparing DNA solutions for PCR, sequencing, cloning, and countless other molecular biology applications. By automating the crucial C₁V₁ = C₂V₂ formula, we eliminate calculation errors that can ruin expensive experiments and waste precious samples.
Whether you're setting up PCR reactions with precise template concentrations, preparing sequencing libraries at optimal densities, or teaching dilution principles in a laboratory course, this calculator provides instant, accurate results. The tool supports all common concentration units used in molecular biology and delivers clear, step-by-step preparation instructions. For comprehensive biology tools, explore our Biology Calculators collection.
Why this calculator is essential for every molecular biologist:
- Eliminates Calculation Errors: No more manual math mistakes that compromise experiments
- Saves Time and Resources: Quick calculations prevent wasted reagents and samples
- Supports All Common Units: Works with ng/µL, µg/mL, nM, and other standard measurements
- Educational Value: Perfect for teaching dilution principles to students and new researchers
- Laboratory-Ready: Designed for use at the bench with clear, practical instructions
This calculator represents just one of many specialized tools in our scientific toolkit. For broader scientific calculations, visit our complete Science Calculators section.
Real-World DNA Dilution Scenarios
PCR Template Preparation: Sarah's Research Success
Sarah, a graduate student researching cancer biomarkers, needed to prepare DNA templates for quantitative PCR. Her stock DNA concentration was 245 ng/µL, but her qPCR protocol required 5 ng/µL template in a 20 µL reaction volume. A manual calculation error could ruin her entire experiment and waste weeks of work.
PCR Preparation Analysis:
- Stock concentration (C₁): 245 ng/µL
- Target concentration (C₂): 5 ng/µL
- Final volume needed (V₂): 20 µL
- Using C₁V₁ = C₂V₂: V₁ = (5 × 20) ÷ 245 = 0.408 µL
- Diluent volume: 20 - 0.408 = 19.592 µL
- Critical insight: Such small volumes (0.408 µL) require precise pipetting
- Alternative approach: Make intermediate dilution for more accurate pipetting
Sarah used our calculator to determine she needed to pipette 0.41 µL of her stock DNA, a volume that's challenging to measure accurately. The calculator suggested making a 1:10 intermediate dilution first, then using 4.1 µL of the intermediate for more reliable results.
For calculations involving reaction thermodynamics, check our Chemistry Calculators.
Sequencing Library Normalization: Mike's NGS Project
Mike, a sequencing facility technician, needed to dilute 12 different DNA libraries to exactly 4 nM each for Illumina sequencing. The libraries had varying initial concentrations from 28 nM to 156 nM, and he needed 10 µL of each at the target concentration.
Sequencing Library Analysis:
- Library 1: Initial 156 nM to 4 nM in 10 µL
- Calculation: V₁ = (4 × 10) ÷ 156 = 0.256 µL stock + 9.744 µL buffer
- Library 2: Initial 28 nM to 4 nM in 10 µL
- Calculation: V₁ = (4 × 10) ÷ 28 = 1.429 µL stock + 8.571 µL buffer
- Library 12: Initial 87 nM to 4 nM in 10 µL
- Calculation: V₁ = (4 × 10) ÷ 87 = 0.460 µL stock + 9.540 µL buffer
- Time saved: 12 calculations completed in 2 minutes vs 15+ minutes manually
- Error prevention: Eliminated risk of transcription errors between calculator and notebook
The calculator's ability to handle multiple calculations quickly and accurately saved Mike significant time and ensured all libraries were prepared correctly for the expensive sequencing run.
For statistical analysis of sequencing results, try our Statistics Calculators.
Teaching Laboratory: Dr. Chen's Molecular Biology Class
Dr. Chen uses our DNA Dilution Calculator in her undergraduate molecular biology laboratory course. Students learn dilution principles by calculating how to prepare various DNA concentrations for restriction digests and ligations.
Educational Application:
- Exercise 1: Dilute 100 ng/µL plasmid to 50 ng/µL in 30 µL
- Student calculation: 15 µL DNA + 15 µL TE buffer
- Exercise 2: Prepare a 1:100 dilution from 250 ng/µL stock
- Student calculation: 1 µL DNA + 99 µL buffer = 2.5 ng/µL
- Exercise 3: Calculate original concentration after 1:50 dilution to 5 ng/µL
- Student calculation: 5 × 50 = 250 ng/µL original concentration
- Learning outcome: Students master C₁V₁ = C₂V₂ through practical application
- Confidence building: Immediate feedback builds calculation confidence
The calculator serves as both teaching tool and verification method, allowing students to check their manual calculations and understand dilution concepts more deeply.
For additional educational tools, explore our Math Calculators section.
The Science Behind DNA Dilution Calculations
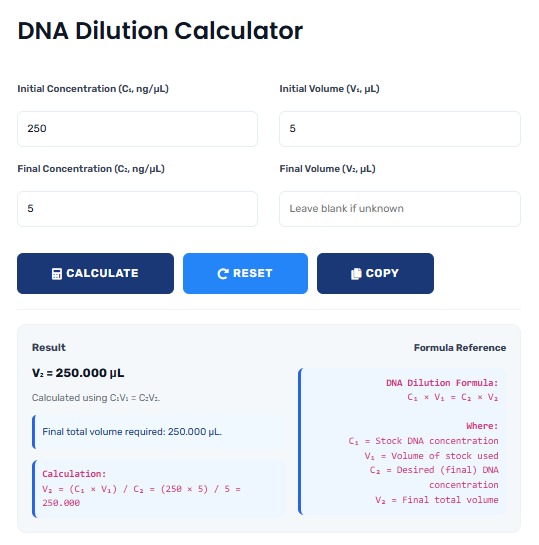
The Fundamental Dilution Formula: C₁V₁ = C₂V₂
Where:
C₁ = Initial concentration (stock solution)
V₁ = Volume of stock solution to use
C₂ = Final concentration (desired concentration)
V₂ = Final volume (total volume needed)
Rearranged Forms:
V₁ = (C₂ × V₂) ÷ C₁ (most common calculation)
C₂ = (C₁ × V₁) ÷ V₂ (calculating final concentration)
V₂ = (C₁ × V₁) ÷ C₂ (calculating final volume)
C₁ = (C₂ × V₂) ÷ V₁ (calculating stock concentration)
Dilution Factor:
DF = C₁ ÷ C₂ = V₂ ÷ V₁
Example: 100 ng/µL diluted to 10 ng/µL = 10× dilution factor
DNA Concentration Units in Molecular Biology
| Unit | Common Applications | Conversion Factors | Typical Ranges | Measurement Method |
|---|---|---|---|---|
| ng/µL (nanograms/microliter) | Most common for genomic DNA, plasmids | 1 ng/µL = 1 µg/mL = 0.001 mg/mL | 1-1000 ng/µL | Nanodrop, Qubit, gel quantification |
| µg/mL (micrograms/milliliter) | Older literature, some protocols | 1 µg/mL = 1 ng/µL = 0.001 mg/mL | 1-1000 µg/mL | Spectrophotometry (A260) |
| nM (nanomolar) | Oligonucleotides, primers, adapters | For dsDNA: 1 ng/µL ≈ 1.5 nM (varies by length) | 10-1000 nM | Calculated from A260 and length |
| µM (micromolar) | Concentrated stocks, some applications | 1 µM = 1000 nM | 0.1-100 µM | Spectrophotometry, calculated |
| Copies/µL | qPCR standards, viral loads | Calculated from concentration and molecular weight | 10³-10¹⁰ copies/µL | Calculated, digital PCR |
Step-by-Step Dilution Protocol
Laboratory Best Practices for Accurate Dilutions:
- Verify Stock Concentration: Always use freshly measured concentration values
- Choose Appropriate Diluent: TE buffer, nuclease-free water, or specific buffer
- Use Calibrated Pipettes: Regularly service and calibrate pipettes
- Consider Intermediate Dilutions: For very small volumes, make intermediate dilution
- Mix Thoroughly: Vortex or pipette mix after adding diluent
- Label Clearly: Include concentration, date, and your initials
- Document Calculations: Keep record of dilution details in lab notebook
- Verify if Critical: For critical applications, verify final concentration
Following these practices ensures your calculated dilutions translate to accurate laboratory preparations. For solution preparation in other contexts, see our Molarity Calculator.
Common Dilution Scenarios and Solutions
| Scenario | Initial Concentration | Target | Calculation | Preparation | Notes |
|---|---|---|---|---|---|
| PCR Template | 180 ng/µL | 20 ng/µL in 25 µL | V₁ = (20×25)/180 = 2.78 µL | 2.78 µL DNA + 22.22 µL water | Make extra for replicates |
| Sequencing Library | 65 nM | 4 nM in 15 µL | V₁ = (4×15)/65 = 0.92 µL | 0.92 µL library + 14.08 µL buffer | Consider 1:10 intermediate |
| Gel Loading | 350 ng/µL | 50 ng in 10 µL | C₂ = 5 ng/µL, V₁ = (5×10)/350 = 0.14 µL | 0.14 µL DNA + 9.86 µL loading buffer | Add loading dye separately |
| Cloning Ligation | 250 ng/µL insert | 50 ng in 20 µL reaction | C₂ = 2.5 ng/µL, V₁ = (2.5×20)/250 = 0.2 µL | 0.2 µL insert + 19.8 µL master mix | Very small volume - dilute first |
| qPCR Standard | 10⁸ copies/µL | 10⁵ copies/µL in 100 µL | 1000× dilution: 0.1 µL DNA + 99.9 µL buffer | Make serial dilutions | Create full standard curve |
Advanced Dilution Strategies
Serial Dilutions for Standard Curves
Challenge: Creating accurate logarithmic dilutions for qPCR
standard curves.
Solution: Use consistent dilution factors (usually 1:10 or 1:5)
at each step.
Example: Starting at 10⁸ copies/µL, make 1:10 dilutions:
• Step 1: 10 µL stock + 90 µL buffer = 10⁷ copies/µL
• Step 2: 10 µL step1 + 90 µL buffer = 10⁶ copies/µL
• Continue to desired lowest concentration
Key: Use fresh pipette tips and mix thoroughly at each step.
Handling Very Small Volumes
When calculations yield volumes smaller than your pipette can accurately measure (typically < 1 µL for P10 pipettes, < 0.1 µL for P2 pipettes), create an intermediate dilution.
Problem: Need 0.15 µL of 500 ng/µL DNA for 5 µL reaction
at 15 ng/µL.
Solution: Make 1:10 intermediate dilution first:
1. 2 µL 500 ng/µL DNA + 18 µL buffer = 50 ng/µL intermediate
2. Now calculate: V₁ = (15×5)/50 = 1.5 µL intermediate
3. Use 1.5 µL intermediate (easier to pipette than 0.15 µL)
Result: More accurate pipetting, less variability
between replicates.
For precision measurement conversions, use our Conversion Calculators.
Troubleshooting Common Dilution Problems
When Dilutions Don't Work as Expected
Scenario: Your PCR doesn't work after diluting template DNA.
-
Check Your Calculations:
- Re-enter values in calculator to verify
- Ensure units are consistent (all ng/µL or all nM)
- Check that you used the correct stock concentration
-
Verify Laboratory Technique:
- Did you pipette the correct volume?
- Did you mix thoroughly after dilution?
- Is your diluent appropriate (nuclease-free, correct buffer)?
-
Consider Sample Issues:
- Was stock concentration measured accurately?
- Has DNA degraded or precipitated?
- Are there inhibitors in your DNA preparation?
-
Test with Controls:
- Run undiluted positive control
- Test dilution with known control DNA
- Verify pipette calibration with dye tests
Laboratory Equipment Considerations
| Equipment | Minimum Accurate Volume | Recommended Use | Calibration Frequency | Common Errors |
|---|---|---|---|---|
| P2 Pipette (0.2-2 µL) | 0.2 µL | Volumes 0.5-2 µL | Every 6-12 months | Not wiping tip, tip not seated |
| P10 Pipette (1-10 µL) | 1 µL | Volumes 2-10 µL | Every 6-12 months | Wrong tip type, expired calibration |
| P20 Pipette (2-20 µL) | 2 µL | Volumes 5-20 µL | Every 6-12 months | Using at minimum volume |
| P100 Pipette (10-100 µL) | 10 µL | Volumes 20-100 µL | Annually | Liquid in pipette shaft |
| P1000 Pipette (100-1000 µL) | 100 µL | Volumes 200-1000 µL | Annually | Not pre-wetting tip |
Special Considerations for Different DNA Types
DNA Characteristics Affecting Dilution:
- Genomic DNA: Viscous at high concentrations, mix thoroughly
- Plasmid DNA: Supercoiled vs linear may behave differently
- PCR Products: Often in excess salts, consider buffer composition
- Oligonucleotides: High absorbance, calculate from A260 and extinction coefficient
- FFPE DNA: Often fragmented, concentration measurements less accurate
- Metagenomic DNA: Mixed origins, may have inhibitors
Understanding your DNA type helps anticipate potential issues and adjust your dilution strategy accordingly.
Quality Control in DNA Dilution
Verifying Dilution Accuracy
For Critical Applications: Always verify important dilutions.
Methods:
1. Spectrophotometry: Measure A260 of diluted sample
2. Fluorometry: Use Qubit or similar for specific
quantification
3. Gel Electrophoresis: Compare band intensity with
standards
4. qPCR: Use dilution in actual assay with controls
5. Digital PCR: Most accurate but resource-intensive
Acceptable Variance: Typically ±10-20% of target concentration, depending on application.
For statistical analysis of your QC results, try our Mean Median Mode Calculator.
Key Laboratory Insight: Accurate DNA dilution is both a mathematical exercise and a practical laboratory skill. While our calculator ensures mathematical precision, successful implementation requires good laboratory technique, proper equipment, and attention to detail. Always consider the practical implications of your calculated volumes—if they're too small to pipette accurately, make an intermediate dilution. Document your calculations and preparations thoroughly for reproducibility. For comprehensive project planning, check our Project Planning Calculators.
Quick Reference: Common Dilution Factors
Standard Dilutions:
- 1:2 dilution: Equal parts sample and diluent
- 1:5 dilution: 1 part sample + 4 parts diluent
- 1:10 dilution: 1 part sample + 9 parts diluent
- 1:20 dilution: 1 part sample + 19 parts diluent
- 1:50 dilution: 1 part sample + 49 parts diluent
- 1:100 dilution: 1 part sample + 99 parts diluent
Concentration Reductions:
- 10× dilution: Reduces concentration to 10% of original
- 100× dilution: Reduces concentration to 1% of original
- 1000× dilution: Reduces concentration to 0.1% of original
- Serial 1:10 dilutions: Each step reduces 10× from previous
Remember: Always mix thoroughly after dilution and use appropriate, nuclease-free diluent!
Frequently Asked Questions
Create an intermediate dilution. For example, if you need 0.15 µL, first make a 1:10 dilution of your stock (1 µL stock + 9 µL buffer). Then calculate using the intermediate concentration. This gives you a larger, more pipettable volume while maintaining accuracy.
For double-stranded DNA: Concentration (nM) = [Concentration (ng/µL) × 1000] ÷ [Number of base pairs × 650]. For a 500 bp DNA at 100 ng/µL: (100 × 1000) ÷ (500 × 650) = 0.308 nM. Our calculator can handle these conversions automatically when you select the appropriate units.
Absolutely! The C₁V₁ = C₂V₂ formula works identically for RNA, proteins, or any solute. Just ensure you're using appropriate concentration units for your application (ng/µL for most RNA work). The mathematical principles are the same regardless of the nucleic acid type.
Start with your highest concentration. For a 1:10 serial dilution, mix 1 part of your current concentration with 9 parts diluent to create the next lower concentration. Repeat this process for as many points as needed. Always use fresh tips and mix thoroughly at each step to ensure accuracy.
Forgetting to account for the volume of DNA when calculating how much diluent to add. If you need 20 µL total and calculate that you need 2 µL of DNA, you must add 18 µL of diluent (not 20 µL). Our calculator automatically accounts for this in its preparation instructions.
For research laboratories, pipettes should be calibrated every 6-12 months. For regulated environments (clinical, diagnostic), follow your quality control program requirements (often every 3-6 months). Always calibrate after repairs or if dropped. Uncalibrated pipettes are a common source of dilution errors.